【推荐理由】赠运费险
【优惠券】20 【券后价】59.00
【下单链接】18¥ CZ0001 G5fHdEqOsnB¥
iOS三种视图切换的原理各不相同:
UITabBarController:以平行的方式管理视图,各个视图之间往往关系并不大,每个加入到UITabBarController的视图都会进行初始化即使当前不显示在界面上,相对比较占用内存。
UINavigationController:以栈的方式管理视图,各个视图的切换就是压栈和出栈操作,出栈后的视图会立即销毁。
UIModalController:以模态窗口的形式管理视图,当前视图关闭前其他视图上的内容无法操作。
1:模态(modal)画面的显示方法:
模态窗口只是视图控制器显示的一种方式(在iOS中并没有专门的模态窗口类),模态窗口不依赖于控制器容器(例如前两种视图切换一个依赖于UITabBarController,另一个依赖于UINavigationController),通常用于显示独立的内容,在模态窗口显示的时其他视图的内容无法进行操作。
模态窗口使用起来比较容易,一般的视图控制器只要调用
- (void)presentViewController:(UIViewController *)viewControllerToPresent animated: (BOOL) flag completion:(void (^)(void))completion NS_AVAILABLE_IOS(5_0);方法那么参数中的视图控制器就会以模态窗口的形式展现,
同时调用:
- (void)dismissViewControllerAnimated: (BOOL)flag completion: (void (^)(void))completion NS_AVAILABLE_IOS(5_0);方法就会关闭模态窗口。
下面的示例中演示了一个登录操作,点击主界面左上方登录按钮以模态窗口的形式展现登录界面,用户点击登录界面中的登录按钮就会返回到主界面。特别强调一点在下面的示例中导航栏是手动创建的,而不是采用UINavigationController,为了帮助大家熟悉导航栏使用同时也了解了UInavigationController中导航栏的本质。
1.首先创建一个登录界面,在界面中只有两个输入框和一个登录按钮
//
//  KCLoginViewController.m
//  ViewTransition
//
//  Created by Kenshin Cui on 14-3-15.
//  Copyright (c) 2014年 Kenshin Cui. All rights reserved.
//#import "KCLoginViewController.h"@interface KCLoginViewController ()

@end

@implementation KCLoginViewController

- (void)viewDidLoad {
    [super viewDidLoad];

    [self addLoginForm];
}

-(void)addLoginForm{    //用户名    UILabel *lbUserName=[[UILabel alloc]initWithFrame:CGRectMake(50, 150, 100, 30)];
    lbUserName.text=@"用户名:";
    [self.view addSubview:lbUserName];

    UITextField *txtUserName=[[UITextField alloc]initWithFrame:CGRectMake(120, 150, 150, 30)];
    txtUserName.borderStyle=UITextBorderStyleRoundedRect;
    [self.view addSubview:txtUserName];
    //密码    UILabel *lbPassword=[[UILabel alloc]initWithFrame:CGRectMake(50, 200, 100, 30)];
    lbPassword.text=@"密码:";
    [self.view addSubview:lbPassword];

    UITextField *txtPassword=[[UITextField alloc]initWithFrame:CGRectMake(120, 200, 150, 30)];
    txtPassword.secureTextEntry=YES;
    txtPassword.borderStyle=UITextBorderStyleRoundedRect;
    [self.view addSubview:txtPassword];
    //登录按钮    UIButton *btnLogin=[UIButton buttonWithType:UIButtonTypeSystem];
    btnLogin.frame=CGRectMake(120, 270, 80, 30);
    [btnLogin setTitle:@"登录" forState:UIControlStateNormal];
    [self.view addSubview:btnLogin];
    [btnLogin addTarget:self action:@selector(login) forControlEvents:UIControlEventTouchUpInside];
}#pragma mark 登录操作
-(void)login{
    [self dismissViewControllerAnimated:YES completion:nil];
}


@end
2.定义主界面视图控制器KCMainViewController,在左上角放一个登录按钮用于弹出登录界面
//
//  KCMainViewController.m
//  ViewTransition
//
//  Created by Kenshin Cui on 14-3-15.
//  Copyright (c) 2014年 Kenshin Cui. All rights reserved.
//#import "KCMainViewController.h"#import "KCLoginViewController.h"@interface KCMainViewController ()

@end

@implementation KCMainViewController

- (void)viewDidLoad {
    [super viewDidLoad];

    [self addNavigationBar];
}#pragma mark 添加导航栏
-(void)addNavigationBar{    //创建一个导航栏    UINavigationBar *navigationBar=[[UINavigationBar alloc]initWithFrame:CGRectMake(0, 0, 320, 44+20)];    //navigationBar.tintColor=[UIColor whiteColor];    [self.view addSubview:navigationBar];    //创建导航控件内容    UINavigationItem *navigationItem=[[UINavigationItem alloc]initWithTitle:@"Web Chat"];
    //左侧添加登录按钮    UIBarButtonItem *loginButton=[[UIBarButtonItem alloc]initWithTitle:@"登录" style:UIBarButtonItemStyleDone target:self action:@selector(login)];

    navigationItem.leftBarButtonItem=loginButton;
    //添加内容到导航栏    [navigationBar pushNavigationItem:navigationItem animated:NO];
}#pragma mark 登录操作
-(void)login{
    KCLoginViewController *loginController=[[KCLoginViewController alloc]init];    //调用此方法显示模态窗口    [self presentViewController:loginController animated:YES completion:nil];
}
@end
要点案例:iphone通讯录管理程序中,追加新的通讯纪录时,就是使用这种模态画面
点击一个按钮,进入另一个界面:
- (IBAction)pressAbout:(id)sender {
    XAboutViewController *about=[[[XAboutViewController alloc] initWithNibName:@"XAboutViewController" bundle:nil] autorelease];
[self presentModalViewController:aboutanimated:YES];//显示模态画面关闭模态画面的方法:
[self dissmissModalViewControllerAnimationed:YES];
2、SwitchViewController中有2个控制器的属性:BviewController,CViewController
点击按钮之后可以在B与C视图之间切换,也就是ios5开发那本书中的多视图应用程序的例子
使用方法:insertSubview: atIndex:
这种画面跳转方法并非最佳的跳转方法:
实际上并非真的实现了两个画面间的跳转,而是同时启动了2个画面,控制其中哪一个画面显示在前台,哪一个画面显示在后台而已。
这种画面跳转方式有一个很大的缺点,即当画面数量增加时,画面跳转的实现代码将月来越复杂,而且各个画面间不可避免的有相互依赖关系。
3、UITabBarController实现并列画面跳转
关键代码:
    //将5个viewController实例放入TabBar的viewcontrollers属性中
    self.tabBarController.viewControllers = @[navFrist, navSecond,navThird,navFourth,navFifth];
    self.window.rootViewController = self.tabBarController;
    [self.window addSubview:self.tabBarController.view];//将根控制器的视图加到应用程序主窗口
UITabBarController是Apple专门为了利用页签切换视图而设计的,在这个视图控制器中有一个UITabBar控件,用户通过点击tabBar进行视图切换。我们知道在UIViewController内部有一个视图,一旦创建了UIViewController之后默认就会显示这个视图,但是UITabBarController本身并不会显示任何视图,如果要显示视图则必须设置其viewControllers属性(它默认显示viewControllers[0])。这个属性是一个数组,它维护了所有UITabBarController的子视图。为了尽可能减少视图之间的耦合,所有的UITabBarController的子视图的相关标题、图标等信息均由子视图自己控制,UITabBarController仅仅作为一个容器存在。

假设现在有一个KCTabBarViewController(继承于UITabBarController),它内部有一个KCWebChatViewController、一个KCContactViewController。
1.首先创建一个KCTabBarViewController继承于UITabBarController(代码是默认生成的,不再贴出来)。
2.其次创建两个子视图,在这两个子视图控制器中设置对应的名称、图标等信息。
KCWebChatViewController.m
//
//  KCWorldClockViewController.m
//  ViewTransition
//
//  Created by Kenshin Cui on 14-3-15.
//  Copyright (c) 2014年 Kenshin Cui. All rights reserved.
//#import "KCWebChatViewController.h"@interface KCWebChatViewController ()

@end

@implementation KCWebChatViewController

- (void)viewDidLoad {
    [super viewDidLoad];

    self.view.backgroundColor=[UIColor redColor];
    //设置视图控制器标题    self.title=@"Chat";
    //注意通过tabBarController或者parentViewController可以得到其俯视图控制器(也就是KCTabBarViewController)    NSLog(@"%i",self.tabBarController==self.parentViewController);//对于当前应用二者相等

    //设置图标、标题(tabBarItem是显示在tabBar上的标签)    self.tabBarItem.title=@"Web Chat";//注意如果这个标题不设置默认在页签上显示视图控制器标题    self.tabBarItem.image=[UIImage imageNamed:@"tabbar_mainframe.png"];//默认图片    self.tabBarItem.selectedImage=[UIImage imageNamed:@"tabbar_mainframeHL.png"];//选中图片

    //图标右上角内容    self.tabBarItem.badgeValue=@"5";

}
@end
KCContactViewController.m
//
//  KCAlarmViewController.m
//  ViewTransition
//
//  Created by Kenshin Cui on 14-3-15.
//  Copyright (c) 2014年 Kenshin Cui. All rights reserved.
//#import "KCContactViewController.h"@interface KCContactViewController ()

@end

@implementation KCContactViewController

- (void)viewDidLoad {
    [super viewDidLoad];
    self.view.backgroundColor=[UIColor yellowColor];

    self.tabBarItem.title=@"Contact";
    self.tabBarItem.image=[UIImage imageNamed:@"tabbar_contacts.png"];
    self.tabBarItem.selectedImage=[UIImage imageNamed:@"tabbar_contactsHL.png"];

}

@end
3.在应用程序启动后设置Tab bar视图控制器的子视图,同时将Tab bar视图控制器作为window的根控制器。
AppDelegate.m
//
//  AppDelegate.m
//  ViewTransition
//
//  Created by Kenshin Cui on 14-3-15.
//  Copyright (c) 2014年 Kenshin Cui. All rights reserved.
//#import "AppDelegate.h"#import "KCTabBarViewController.h"#import "KCWebChatViewController.h"#import "KCContactViewController.h"@interface AppDelegate ()

@end

@implementation AppDelegate


- (BOOL)application:(UIApplication *)application didFinishLaunchingWithOptions:(NSDictionary *)launchOptions {

    _window=[[UIWindow alloc]initWithFrame:[UIScreen mainScreen].bounds];

    KCTabBarViewController *tabBarController=[[KCTabBarViewController alloc]init];

    KCWebChatViewController *webChatController=[[KCWebChatViewController alloc]init];
    KCContactViewController *contactController=[[KCContactViewController alloc]init];
    tabBarController.viewControllers=@[webChatController,contactController];    //注意默认情况下UITabBarController在加载子视图时是懒加载的,所以这里调用一次contactController,否则在第一次展示时只有第一个控制器tab图标,contactController的tab图标不会显示    for (UIViewController *controller in tabBarController.viewControllers) {
        UIViewController *view= controller.view;
    }

    _window.rootViewController=tabBarController;
    [_window makeKeyAndVisible];
    return YES;
}

- (void)applicationWillResignActive:(UIApplication *)application {    // Sent when the application is about to move from active to inactive state. This can occur for certain types of temporary interruptions (such as an incoming phone call or SMS message) or when the user quits the application and it begins the transition to the background state.
    // Use this method to pause ongoing tasks, disable timers, and throttle down OpenGL ES frame rates. Games should use this method to pause the game.}

- (void)applicationDidEnterBackground:(UIApplication *)application {    // Use this method to release shared resources, save user data, invalidate timers, and store enough application state information to restore your application to its current state in case it is terminated later.
    // If your application supports background execution, this method is called instead of applicationWillTerminate: when the user quits.}

- (void)applicationWillEnterForeground:(UIApplication *)application {    // Called as part of the transition from the background to the inactive state; here you can undo many of the changes made on entering the background.}

- (void)applicationDidBecomeActive:(UIApplication *)application {    // Restart any tasks that were paused (or not yet started) while the application was inactive. If the application was previously in the background, optionally refresh the user interface.}

- (void)applicationWillTerminate:(UIApplication *)application {    // Called when the application is about to terminate. Save data if appropriate. See also applicationDidEnterBackground:.}

@end
运行效果:


对于UITabBarController简单总结如下:
UITabBarController会一次性初始化所有子控制器,但是默认只加载第一个控制器视图,其他视图控制器只初始化默认不会加载,为了能够将其他子控制器也正常显示在Tab bar中,我们访问了每个子视图控制器的视图以便调用其视图加载方法(viewDidLoad);当然,既然会调用子视图的初始化方法,当然也可以将视图控制器的tabBarItem属性设置放到init方法中设置,如此则不用再遍历其视图属性了。
每个视图控制器都有一个tabBarController属性,通过它可以访问所在的UITabBarController,而且对于UITabBarController的直接子视图其tabBarController等于parentViewController。
每个视图控制器都有一个tabBarItem属性,通过它控制视图在UITabBarController的tabBar中的显示信息。
tabBarItem的image属性必须是png格式(建议大小32*32)并且打开alpha通道否则无法正常显示。
4、UINavigationController实现多层画面跳转,在导航控制器中,载入有层级关系的界面
关键代码:
- (IBAction)addRightAction:(id)sender
{
    XAddSymbolViewController *addSymbol=[[[XAddSymbolViewController alloc]initWithNibName:@"XAddSymbolViewController" bundle:nil] autorelease];
    [self.navigationController pushViewController:addSymbolanimated:YES];
}
UINavigationController是一个导航控制器,它用来组织有层次关系的视图,在UINavigationController中子控制器以栈的形式存储,只有在栈顶的控制器能够显示在界面中,一旦一个子控制器出栈则会被销毁。UINavigationController默认也不会显示任何视图(这个控制器自身的UIView不会显示),它必须有一个根控制器rootViewController,而且这个根控制器不会像其他子控制器一样被销毁。

下面简单通过几个视图模拟一下微信添加好友的功能,假设有一个导航控制器,它的根控制器为好友列表控制器KCFriendViewController,通过它可以导航到添加QQ联系人视图KCQQContactViewController,在QQ联系人视图又可以导航到公共账号视图KCPublicAccountViewController。
首先在应用代理启动后初始化一个导航控制器并设置其根控制器为KCFriendViewController
//
//  AppDelegate.m
//  ViewTransition
//
//  Created by Kenshin Cui on 14-3-15.
//  Copyright (c) 2014年 Kenshin Cui. All rights reserved.
//#import "AppDelegate.h"#import "KCTabBarViewController.h"#import "KCWebChatViewController.h"#import "KCContactViewController.h"#import "KCFriendViewController.h"#import "KCQQContactViewController.h"@interface AppDelegate ()

@end

@implementation AppDelegate


- (BOOL)application:(UIApplication *)application didFinishLaunchingWithOptions:(NSDictionary *)launchOptions {

    _window=[[UIWindow alloc]initWithFrame:[UIScreen mainScreen].bounds];

    _window.backgroundColor =[UIColor colorWithRed:249/255.0 green:249/255.0 blue:249/255.0 alpha:1];    //设置全局导航条风格和颜色    [[UINavigationBar appearance] setBarTintColor:[UIColor colorWithRed:23/255.0 green:180/255.0 blue:237/255.0 alpha:1]];
    [[UINavigationBar appearance] setBarStyle:UIBarStyleBlack];

    KCFriendViewController *friendController=[[KCFriendViewController alloc]init];
    UINavigationController *navigationController=[[UINavigationController alloc]initWithRootViewController:friendController];

    _window.rootViewController=navigationController;

    [_window makeKeyAndVisible];
    return YES;
}

- (void)applicationWillResignActive:(UIApplication *)application {    // Sent when the application is about to move from active to inactive state. This can occur for certain types of temporary interruptions (such as an incoming phone call or SMS message) or when the user quits the application and it begins the transition to the background state.
    // Use this method to pause ongoing tasks, disable timers, and throttle down OpenGL ES frame rates. Games should use this method to pause the game.}

- (void)applicationDidEnterBackground:(UIApplication *)application {    // Use this method to release shared resources, save user data, invalidate timers, and store enough application state information to restore your application to its current state in case it is terminated later.
    // If your application supports background execution, this method is called instead of applicationWillTerminate: when the user quits.}

- (void)applicationWillEnterForeground:(UIApplication *)application {    // Called as part of the transition from the background to the inactive state; here you can undo many of the changes made on entering the background.}

- (void)applicationDidBecomeActive:(UIApplication *)application {    // Restart any tasks that were paused (or not yet started) while the application was inactive. If the application was previously in the background, optionally refresh the user interface.}

- (void)applicationWillTerminate:(UIApplication *)application {    // Called when the application is about to terminate. Save data if appropriate. See also applicationDidEnterBackground:.}

@end
2.在好友列表视图控制器中设置导航栏左右按钮,并且设置点击右侧按钮导航到添加QQ联系人视图
//
//  KCFriendViewController.m
//  ViewTransition
//
//  Created by Kenshin Cui on 14-3-15.
//  Copyright (c) 2014年 Kenshin Cui. All rights reserved.
//#import "KCFriendViewController.h"#import "KCQQContactViewController.h"@interface KCFriendViewController ()

@end

@implementation KCFriendViewController

- (void)viewDidLoad {
    [super viewDidLoad];
    //每次出栈都会销毁相应的子控制器    NSLog(@"childViewControllers:%@",self.navigationController.childViewControllers);
    //在子视图中可以通过navigationController属性访问导航控制器,
    //同时对于当前子视图来说其父控制器就是其导航控制器    NSLog(@"%i",self.navigationController==self.parentViewController);
    //在子视图中(或者根视图)有一个navigationItem用于访问其导航信息    self.navigationItem.title=@"Friends";//或者直接设置控制器title(例如[self setTitle:@"Friends"])
    //设置导航栏左侧按钮    self.navigationItem.leftBarButtonItem=[[UIBarButtonItem alloc]initWithTitle:@"Edit" style:UIBarButtonSystemItemAdd target:nil action:nil];    //设置导航栏右侧按钮    self.navigationItem.rightBarButtonItem=[[UIBarButtonItem alloc]initWithImage:[UIImage imageNamed:@"ff_IconAdd.png"] style:UIBarButtonItemStyleDone target:self action:@selector(addFriends)];}

-(void)addFriends{    //通过push导航到另外一个子视图    KCQQContactViewController *qqContactController=[[KCQQContactViewController alloc]init];
    [self.navigationController pushViewController:qqContactController animated:YES];
}
@end
3.在QQ联系人视图右侧导航中添加一个导航到公共账号的按钮
//
//  KCQQContactViewController.m
//  ViewTransition
//
//  Created by Kenshin Cui on 14-3-15.
//  Copyright (c) 2014年 Kenshin Cui. All rights reserved.
//#import "KCQQContactViewController.h"#import "KCPublicAccountViewController.h"@interface KCQQContactViewController ()

@end

@implementation KCQQContactViewController

- (void)viewDidLoad {
    [super viewDidLoad];
    //每次出栈都会销毁相应的子控制器    NSLog(@"childViewControllers:%@",self.navigationController.childViewControllers);

    [self setTitle:@"QQ Contact"];    //self.title=@"QQ contact";
    //self.navigationItem.title=@"My QQ";
    UIBarButtonItem *back=[[UIBarButtonItem alloc]initWithTitle:@"QQ" style:UIBarButtonItemStyleDone target:nil action:nil];
    self.navigationItem.backBarButtonItem=back;

    self.navigationItem.rightBarButtonItem=[[UIBarButtonItem alloc]initWithTitle:@"Public Account" style:UIBarButtonItemStyleDone target:self action:@selector(gotoNextView)];
}

-(void)gotoNextView{
    KCPublicAccountViewController *publicAccountController=[[KCPublicAccountViewController alloc]init];
    [self.navigationController pushViewController:publicAccountController  animated:YES];
}
@end
4.在公共账号视图中在导航栏右侧设置一个按钮用于直接返回根视图
//
//  KCPublicNumberViewController.m
//  ViewTransition
//
//  Created by Kenshin Cui on 14-3-15.
//  Copyright (c) 2014年 Kenshin Cui. All rights reserved.
//#import "KCPublicAccountViewController.h"@interface KCPublicAccountViewController ()

@end

@implementation KCPublicAccountViewController

- (void)viewDidLoad {
    [super viewDidLoad];
    //每次出栈都会销毁相应的子控制器    NSLog(@"childViewControllers:%@",self.navigationController.childViewControllers);

    self.title=@"Public Account";

    self.navigationItem.rightBarButtonItem=[[UIBarButtonItem alloc]initWithTitle:@"Add Friends" style:UIBarButtonItemStyleDone target:self action:@selector(gotoAddFriends)];

}


-(void)gotoAddFriends{    //直接跳转到根控制器,也可以使用- (NSArray *)popToViewController:(UIViewController *)viewController animated:(BOOL)animated; 方法    [self.navigationController popToRootViewControllerAnimated:YES];
}

@end
UINavigationController默认显示一个根控制器,这个根视图必须指定(前面我们说过UINavigationController和UITabBarController类似仅仅作为导航容器,本身并不会显示视图),通过根控制器导航到其他下一级子视图。
在子视图中可以通过navigationController访问导航控制器,同时可以通过navigationController的childViewControllers获得当前栈中所有的子视图(注意每一个出栈的子视图都会被销毁)。
UINavigationController导航是通过上方导航栏进行的(类似的UITabBarController是通过下方UITabBar进行导航),每个放到UINavigationController栈中的子视图都会显示一个导航栏,可以通过子控制器(包括根控制器)的navigationItem访问这个导航栏,修改其左右两边的按钮内容。
默认情况下除了根控制器之外的其他子控制器左侧都会在导航栏左侧显示返回按钮,点击可以返回上一级视图,同时按钮标题默认为上一级视图的标题,可以通过backBarButtonItem修改。下一级子视图左侧返回按钮上的标题的显示优先级为: 导航栏返回按钮backBarButtonItem的标题(注意不能直接给backBarButtonItem的标题赋值,只能重新给backBarButtonItem赋值)、导航栏navigationItem的标题,视图控制器标题。
演示效果:

5、参数传递
假设用户名输入“kenshincui”,密码输入“123”就认为登录成功,否则登录失败。同时登录成功之后在主视图控制器中显示用户名并且登录按钮变成“注销”。要实现这个功能主要的问题就是如何把登录后的用户名信息传递到主界面?由此引出一个问题:多视图参数传递。
在iOS开发中常用的参数传递有以下几种方法:
采用代理模式
采用iOS消息机制
通过NSDefault存储(或者文件、数据库存储等)
通过AppDelegate定义全局变量(或者使用UIApplication、定义一个单例类等)
通过控制器属性传递
今天我们主要采用第一种方式进行数据传递(代理模式),这在iOS开发中也是最常见的一种多视图传参方式。使用代理方式传递参数的步骤如下:
1.定义协议,协议中定义好传参时所需要的方法
2.目标视图控制器定义一个代理对象
3.源视图控制器实现协议并在初始化目标控制器时指定目标控制器的代理为其自身
4.需要传参的时候在目标窗口调用代理的协议方法
具体代码如下:
KCMainViewController.h
//
//  KCMainViewController.h
//  ViewTransition
//
//  Created by Kenshin Cui on 14-3-15.
//  Copyright (c) 2014年 Kenshin Cui. All rights reserved.
//#import <UIKit/UIKit.h>#pragma mark 定义一个协议用于参数传递
@protocol KCMainDelegate
-(void)showUserInfoWithUserName:(NSString *)userName;
@end

@interface KCMainViewController : UIViewController

@end
KCMainViewController.m
//
//  KCMainViewController.m
//  ViewTransition
//
//  Created by Kenshin Cui on 14-3-15.
//  Copyright (c) 2014年 Kenshin Cui. All rights reserved.
//#import "KCMainViewController.h"#import "KCLoginViewController.h"@interface KCMainViewController ()<KCMainDelegate,UIActionSheetDelegate>{
    UILabel *_loginInfo;
    UIBarButtonItem *_loginButton;
    BOOL _isLogon;
}

@end

@implementation KCMainViewController

- (void)viewDidLoad {
    [super viewDidLoad];

    [self addNavigationBar];

    [self addLoginInfo];
}#pragma mark 添加信息显示
-(void)addLoginInfo{
    _loginInfo =[[UILabel alloc]initWithFrame:CGRectMake(0, 100,320 ,30)];
    _loginInfo.textAlignment=NSTextAlignmentCenter;
    [self.view addSubview:_loginInfo];
}#pragma mark 添加导航栏
-(void)addNavigationBar{    //创建一个导航栏    UINavigationBar *navigationBar=[[UINavigationBar alloc]initWithFrame:CGRectMake(0, 0, 320, 44+20)];    //navigationBar.tintColor=[UIColor whiteColor];    [self.view addSubview:navigationBar];    //创建导航控件内容    UINavigationItem *navigationItem=[[UINavigationItem alloc]initWithTitle:@"Web Chat"];
    //左侧添加登录按钮    _loginButton=[[UIBarButtonItem alloc]initWithTitle:@"登录" style:UIBarButtonItemStyleDone target:self action:@selector(login)];

    navigationItem.leftBarButtonItem=_loginButton;
    //添加内容到导航栏    [navigationBar pushNavigationItem:navigationItem animated:NO];
}#pragma mark 登录操作
-(void)login{    if (!_isLogon) {
        KCLoginViewController *loginController=[[KCLoginViewController alloc]init];
        loginController.delegate=self;//设置代理
        //调用此方法显示模态窗口        [self presentViewController:loginController animated:YES completion:nil];
    }else{        //如果登录之后则处理注销的情况
        //注意当前视图控制器必须实现UIActionSheet代理才能进行操作        UIActionSheet *actionSheet=[[UIActionSheet alloc]initWithTitle:@"系统信息" delegate:self cancelButtonTitle:@"取消" destructiveButtonTitle:@"注销" otherButtonTitles: nil];
        [actionSheet showInView:self.view];
    }
}#pragma mark 实现代理方法
-(void)showUserInfoWithUserName:(NSString *)userName{
    _isLogon=YES;    //显示登录用户的信息    _loginInfo.text=[NSString stringWithFormat:@"Hello,%@!",userName];    //登录按钮内容改为“注销”    _loginButton.title=@"注销";
}#pragma mark 实现注销方法
-(void)actionSheet:(UIActionSheet *)actionSheet clickedButtonAtIndex:(NSInteger)buttonIndex{    if (buttonIndex==0) {//注销按钮        _isLogon=NO;
        _loginButton.title=@"登录";
        _loginInfo.text=@"";
    }
}
@end
KCLoginViewController.h
//
//  KCLoginViewController.h
//  ViewTransition
//
//  Created by Kenshin Cui on 14-3-15.
//  Copyright (c) 2014年 Kenshin Cui. All rights reserved.
//#import <UIKit/UIKit.h>@protocol KCMainDelegate;

@interface KCLoginViewController : UIViewController#pragma mark 定义代理
@property (nonatomic,strong) id<KCMainDelegate> delegate;

@end
KCLoginViewController.m
//
//  KCLoginViewController.m
//  ViewTransition
//
//  Created by Kenshin Cui on 14-3-15.
//  Copyright (c) 2014年 Kenshin Cui. All rights reserved.
//#import "KCLoginViewController.h"#import "KCMainViewController.h"@interface KCLoginViewController (){
    UITextField *_txtUserName;
    UITextField *_txtPassword;
}

@end

@implementation KCLoginViewController

- (void)viewDidLoad {
    [super viewDidLoad];

    [self addLoginForm];
}

-(void)addLoginForm{    //用户名    UILabel *lbUserName=[[UILabel alloc]initWithFrame:CGRectMake(50, 150, 100, 30)];
    lbUserName.text=@"用户名:";
    [self.view addSubview:lbUserName];

    _txtUserName=[[UITextField alloc]initWithFrame:CGRectMake(120, 150, 150, 30)];
    _txtUserName.borderStyle=UITextBorderStyleRoundedRect;
    [self.view addSubview:_txtUserName];
    //密码    UILabel *lbPassword=[[UILabel alloc]initWithFrame:CGRectMake(50, 200, 100, 30)];
    lbPassword.text=@"密码:";
    [self.view addSubview:lbPassword];

    _txtPassword=[[UITextField alloc]initWithFrame:CGRectMake(120, 200, 150, 30)];
    _txtPassword.secureTextEntry=YES;
    _txtPassword.borderStyle=UITextBorderStyleRoundedRect;
    [self.view addSubview:_txtPassword];
    //登录按钮    UIButton *btnLogin=[UIButton buttonWithType:UIButtonTypeSystem];
    btnLogin.frame=CGRectMake(70, 270, 80, 30);
    [btnLogin setTitle:@"登录" forState:UIControlStateNormal];
    [self.view addSubview:btnLogin];
    [btnLogin addTarget:self action:@selector(login) forControlEvents:UIControlEventTouchUpInside];
    //取消登录按钮    UIButton *btnCancel=[UIButton buttonWithType:UIButtonTypeSystem];
    btnCancel.frame=CGRectMake(170, 270, 80, 30);
    [btnCancel setTitle:@"取消" forState:UIControlStateNormal];
    [self.view addSubview:btnCancel];
    [btnCancel addTarget:self action:@selector(cancel) forControlEvents:UIControlEventTouchUpInside];
}#pragma mark 登录操作
-(void)login{    if ([_txtUserName.text isEqualToString:@"kenshincui"] && [_txtPassword.text isEqualToString:@"123"] ) {        //调用代理方法传参        [self.delegate showUserInfoWithUserName:_txtUserName.text];

        [self dismissViewControllerAnimated:YES completion:nil];
    }    else{        //登录失败弹出提示信息        UIAlertView *alertView=[[UIAlertView alloc]initWithTitle:@"系统信息" message:@"用户名或密码错误,请重新输入!" delegate:nil cancelButtonTitle:@"取消" otherButtonTitles:nil];
        [alertView show];
    }

}#pragma mark 点击取消
-(void)cancel{
    [self dismissViewControllerAnimated:YES completion:nil];
}

@end
在上面的代码中,点击登录可以跳转到登录界面,如果用户名、密码输入正确可以回传参数到主界面中(不正确则给出提示),同时修改主界面按钮显示内容。如果已经登录则点击注销会弹出提示,点击确定注销则会注销登录信息。在代码中我们还用到了UIActionSheet和UIAlert,这两个控件其实也是模态窗口,只是没有铺满全屏,大家以后的开发中会经常用到。
假设登录之后在主视图控制器右上角点击“我”可以弹出当前用户信息如何实现呢?这个时候我们需要从主视图控制器传递参数到子视图控制器,和前面的传参刚好相反,这个时候我们通常使用上面提到的第五个方法(通过控制器属性传递),设置目标视图控制器的属性。
首先修改一下主视图控制器
//
//  KCMainViewController.m
//  ViewTransition
//
//  Created by Kenshin Cui on 14-3-15.
//  Copyright (c) 2014年 Kenshin Cui. All rights reserved.
//#import "KCMainViewController.h"#import "KCLoginViewController.h"#import "KCMeViewController.h"@interface KCMainViewController ()<KCMainDelegate,UIActionSheetDelegate>{
    UILabel *_loginInfo;
    UIBarButtonItem *_loginButton;
    UIBarButtonItem *_meButton;
    BOOL _isLogon;
}

@end

@implementation KCMainViewController

- (void)viewDidLoad {
    [super viewDidLoad];

    [self addNavigationBar];

    [self addLoginInfo];
}#pragma mark 添加信息显示
-(void)addLoginInfo{
    _loginInfo =[[UILabel alloc]initWithFrame:CGRectMake(0, 100,320 ,30)];
    _loginInfo.textAlignment=NSTextAlignmentCenter;
    [self.view addSubview:_loginInfo];
}#pragma mark 添加导航栏
-(void)addNavigationBar{    //创建一个导航栏    UINavigationBar *navigationBar=[[UINavigationBar alloc]initWithFrame:CGRectMake(0, 0, 320, 44+20)];    //navigationBar.tintColor=[UIColor whiteColor];    [self.view addSubview:navigationBar];    //创建导航控件内容    UINavigationItem *navigationItem=[[UINavigationItem alloc]initWithTitle:@"Web Chat"];
    //左侧添加登录按钮    _loginButton=[[UIBarButtonItem alloc]initWithTitle:@"登录" style:UIBarButtonItemStyleDone target:self action:@selector(login)];

    navigationItem.leftBarButtonItem=_loginButton;
    //左侧添加导航    _meButton=[[UIBarButtonItem alloc]initWithTitle:@"我" style:UIBarButtonItemStyleDone target:self action:@selector(showInfo)];
    _meButton.enabled=NO;
    navigationItem.rightBarButtonItem=_meButton;
    //添加内容到导航栏    [navigationBar pushNavigationItem:navigationItem animated:NO];
}#pragma mark 登录操作
-(void)login{    if (!_isLogon) {
        KCLoginViewController *loginController=[[KCLoginViewController alloc]init];
        loginController.delegate=self;//设置代理
        //调用此方法显示模态窗口        [self presentViewController:loginController animated:YES completion:nil];
    }else{        //如果登录之后则处理注销的情况
        //注意必须实现对应代理        UIActionSheet *actionSheet=[[UIActionSheet alloc]initWithTitle:@"系统信息" delegate:self cancelButtonTitle:@"取消" destructiveButtonTitle:@"注销" otherButtonTitles: nil];
        [actionSheet showInView:self.view];
    }
}#pragma mark 点击查看我的信息
-(void)showInfo{    if (_isLogon) {
        KCMeViewController *meController=[[KCMeViewController alloc]init];
        meController.userInfo=_loginInfo.text;
        [self presentViewController:meController animated:YES completion:nil];
    }
}#pragma mark 实现代理方法
-(void)showUserInfoWithUserName:(NSString *)userName{
    _isLogon=YES;    //显示登录用户的信息    _loginInfo.text=[NSString stringWithFormat:@"Hello,%@!",userName];    //登录按钮内容改为“注销”    _loginButton.title=@"注销";
    _meButton.enabled=YES;
}#pragma mark 实现注销方法
-(void)actionSheet:(UIActionSheet *)actionSheet clickedButtonAtIndex:(NSInteger)buttonIndex{    if (buttonIndex==0) {//注销按钮        _isLogon=NO;
        _loginButton.title=@"登录";
        _loginInfo.text=@"";
        _meButton.enabled=NO;
    }
}
@end
2.添加展示用户信息的控制器视图
KCMeViewController.h
//
//  KCMeViewController.h
//  ViewTransition
//
//  Created by Kenshin Cui on 14-3-15.
//  Copyright (c) 2014年 Kenshin Cui. All rights reserved.
//#import <UIKit/UIKit.h>@interface KCMeViewController : UIViewController#pragma mark 需要传递的属性参数(很多时候它是一个数据模型)
@property (nonatomic,copy) NSString *userInfo;

@end
KCMeViewController.m
//
//  KCMeViewController.m
//  ViewTransition
//
//  Created by Kenshin Cui on 14-3-15.
//  Copyright (c) 2014年 Kenshin Cui. All rights reserved.
//#import "KCMeViewController.h"@interface KCMeViewController (){
    UILabel *_lbUserInfo;
}

@end

@implementation KCMeViewController

- (void)viewDidLoad {
    [super viewDidLoad];
    //信息显示标签    _lbUserInfo =[[UILabel alloc]initWithFrame:CGRectMake(0, 100,320 ,30)];
    _lbUserInfo.textAlignment=NSTextAlignmentCenter;
    _lbUserInfo.textColor=[UIColor colorWithRed:23/255.0 green:180/255.0 blue:237/255.0 alpha:1];
    [self.view addSubview:_lbUserInfo];
    //关闭按钮    UIButton *btnClose=[UIButton buttonWithType:UIButtonTypeSystem];
    btnClose.frame=CGRectMake(110, 200, 100, 30);
    [btnClose setTitle:@"关闭" forState:UIControlStateNormal];
    [btnClose addTarget:self action:@selector(close) forControlEvents:UIControlEventTouchUpInside];
    [self.view addSubview:btnClose];
    //设置传值信息    _lbUserInfo.text=_userInfo;
}#pragma mark 关闭
-(void)close{
    [self dismissViewControllerAnimated:YES completion:nil];
}
@end
前面代码中除了演示了模态窗口的使用还演示了两种多视图参数传递方法,其他方法日后我们再做介绍。
最后完整展现一下整个示例程序:

 绿色山茶油金黄色背景设计图[2018-12-06]
 金红色纯芝麻油[2018-12-06]
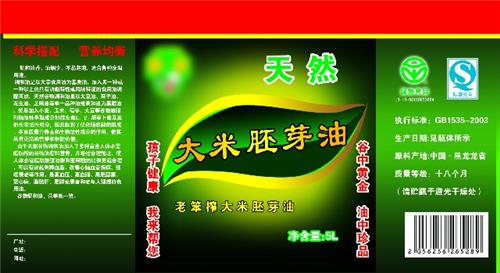 绿色科学搭配天然玉米胚芽油[2018-12-06]
 蓝天背景油菜花籽油[2018-12-06]
 绿色金杯特价油[2018-12-06]
 油品如人品[2018-12-06]
 绿色花生油[2018-12-06]
 绿色玉米胚芽油[2018-12-06]